How To Activate UPI Service In Canara Bank ai1 Mobile Banking App
Canara bank provides UPI a service through which you can quickly and easily access your Canara Bank accounts on your mobile and perform financial transactions. So if you have an account in the Canara bank then you can register on UPI easily that too just in a few seconds using the mobile banking app of Canara bank. The official mobile banking application of Canara bank is named ‘Canara ai1’ which is available on the play store for android devices and AppStore for ioS devices.

You can transfer money to the receiver’s bank account in less than a minute. The entire payment process through UPI is contactless and the whole registering process can be done in the comfort of your home. Also, you do not have to worry as the payments through UPI are absolutely safe and secure. Also, note that the maximum amount limit is Rs. 1,00,000 per day. So you can only transfer money or make payments only up to Rs. 1,00,000 per day. In this article, we will be discussing the step-by-step process to register UPI through Canara bank’s mobile banking app which is named Canara ai1. So follow the step-by-step process to register for UPI successfully without having to face any obstacles.
There are a few requirements and prerequisites you have to meet to register for UPI through the Canara Bank mobile banking app which is the Canara ai1 app. The prerequisites are as follows –
- You need a smartphone and stable, strong internet connectivity.
- You should have an active bank account which should be valid.
- You also have to register and link your mobile number to your bank account.
- You should have an active Debit card or ATM card.
- The most important all is you need an active mobile banking service on the ai1 app. (Here are the steps to register and activate Canara Bank Mobile Banking ai1 App)
After meeting the above requirement, customers can proceed with the registration of the UPI account of Canara Bank.
How to create a register UPI on Canara Bank ai1 app
Here are the steps to register for UPI through Canara Bank’s mobile banking app that is Canara ai1
Step 1: Download the Canara Bank mobile banking application that is ‘Canara ai1’ from the PlayStore or AppStore depending on the device that you use.
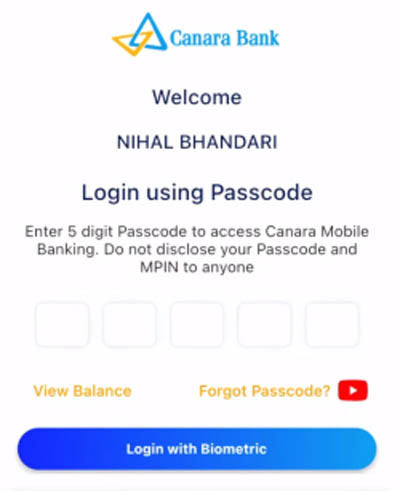
Step 2: Log in to your account by entering your login PIN code.
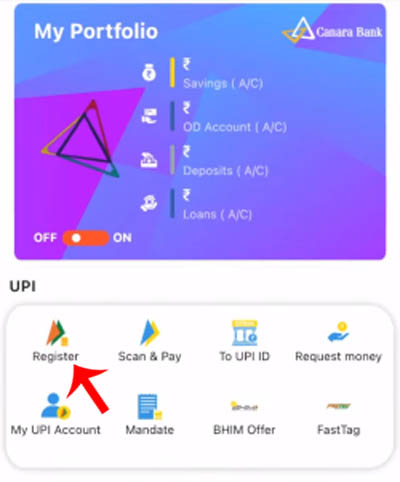
Step 3: You will be automatically redirected to the dashboard where you have to click on the ‘UPI section’. Then click on the ‘register’ option to initiate the registration process.
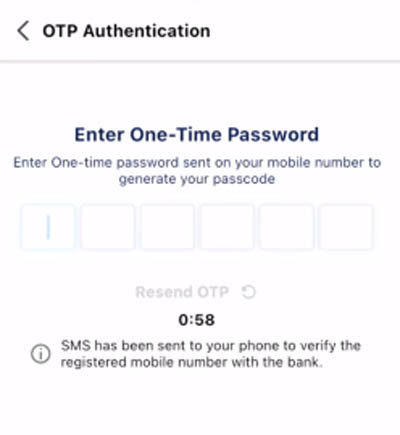
Step 4: Then you will receive an OTP via SMS on your registered mobile number as a part of the verification process. (The OTP sent through SMS will be automatically detected for android devices) Enter the OTP that you have received.
Then click on the ‘Register’ button
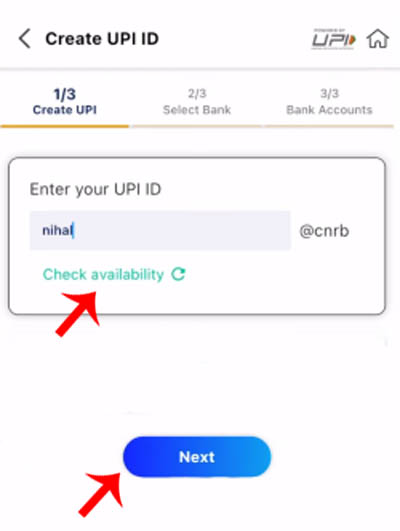
Step 5: Then click on the ‘Register’ button. Now you can fully customize and create the UPI ID you want. But you will have to click on the ‘Check availability’ option to see if the UPI ID that you have created is available or not. ( If in case the UPI ID that you have created is not available then you can choose any one from the options or try creating another custom ID)
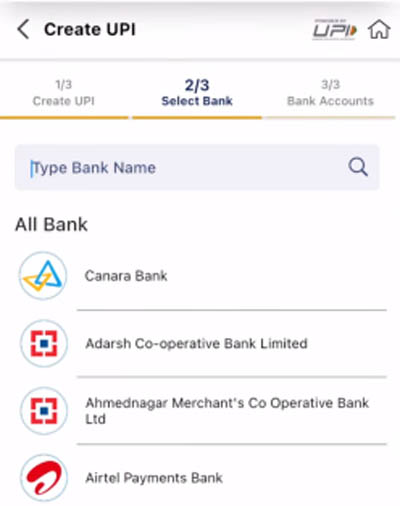
Step 6: Now select any bank from the list which you want to add to the Canara ai1 app for transactions.
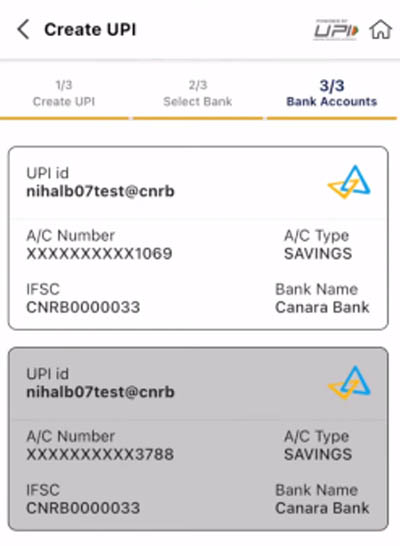
Step 7: Now you will have to select the account that you would like to link to your UPI ID for payments and transactions.
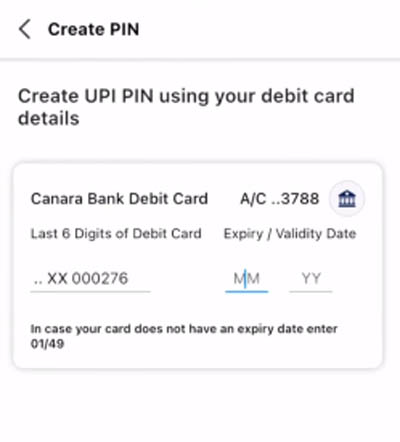
Step 8: Now you will have to create a transaction pin. For creating the transaction pin you will have to enter your debit card details like
- The last six digits of your debit card number
- The expiry date of your debit card in the format MM/YY. ( If in case your card does not have any Expiry date then you will have to enter 01/49)
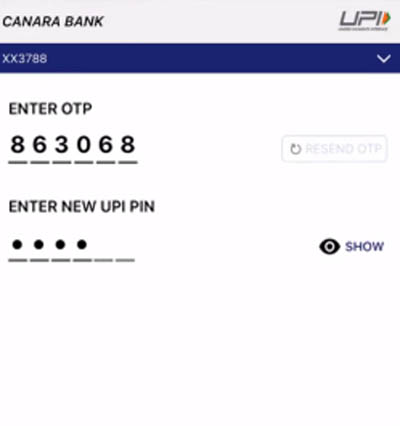
Step 9: Then you will receive an OTP on your registered mobile number. Enter the OTP that you have received. Now finally you will have to set a new six-digit UPI Pin.
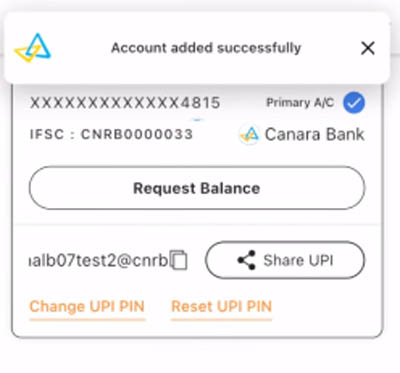
And voila! You have successfully registered and you are now all set to perform UPI transactions using the Canara ai1 app.
This is how you can register for UPI through the Canara Bank mobile application which is the Canara ai1 app. The transaction pin is the most important of all. So make sure that you set a super strong transaction pin. Also, remember that you can change your transaction pin as many times as you want. It is advisable to change your transaction pin from time to time.
You can also set up an app password so that no one can even open the app without knowing your app password. You can also create a PIN or pattern lock for your phone so that no one can open your mobile.
These are some of the tasks that you can perform using UPI
- You can check your account balance.
- You can also transfer instant funds to anyone in India in real time. Transfer up to Rs. 1,00,000 per day as it is the maximum amount limit.
- You can pay your credit card bills, electricity bills, and gas bills as well.
- You can do mobile recharge & mobile post-paid bill payments as well.
- DTH recharge can also be done.
- Medical claim (Health Insurance) premium payment can also be made.
- You can buy insurance as well.
- Book fixed deposit can also be made.
- You can transfer the payment through your UPI via the Canara ai1 app to the receiver’s unique UPI ID.
Similarly, you can receive payment from others through your unique UPI ID. It’s important to share the right UPI ID when you want to receive the payment. You should verify the receiver’s UPI ID before processing the transaction when you send the payment. You can transfer payment to the receiver by scanning a UPI QR code. Once you scan the QR code, the receiver’s unique UPI code will show on the payment page. You must verify the QR code before transferring the amount. And finally when you make any payment through UPI make sure to check the received SMS on your registered mobile number from the bank to verify the amount deducted from your account. So follow all the steps given above and also take extra care while making payments make sure that you follow all the instructions mentioned in this article and you will be able to complete the registration process without any hassle.