How to Change Your Name on Your BSES Delhi Electricity Bill Online (Rajdhani & Yamuna)
Have you ever needed to update your name on your electricity bill in Delhi? Good news! You can do it easily and conveniently online. Whether you’ve changed your name due to marriage, legal reasons, or any other circumstance, the process to update your information has become simpler than ever.
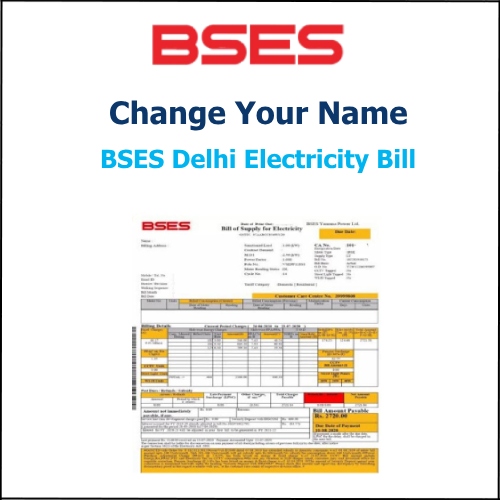
In this article, we will be discussing the detailed step-by-step process to change your name on your Delhi electricity bill online. We will be discussing the steps with the help of which you can change the name on your electricity bill for BSES Rajdhani or Yamuna Ltd. So make sure that you read this article till the very end and also do not forget to follow each and every step given below in order to avoid any obstacles or mistakes.
Change Your Name on Your BSES Rajdhani or Yamuna Electricity Bill Online
Step 1: Launch a web browser on your laptop, mobile phone, or computer. Afterward, navigate to the official website of BSES Delhi by entering www.bsesdelhi.com in the browser’s address bar.
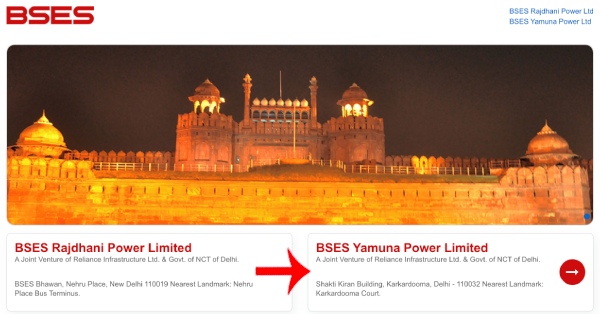
Step 2: Once you click on this link you will be redirected to the official website of BSES. Now here you can select your connection. So you can click on ‘BSES Rajdhani Power Ltd’ or ‘BSES Yamuna Power Ltd’. For this article, we will be clicking on the ‘BSES Yamuna Power Ltd’ option.
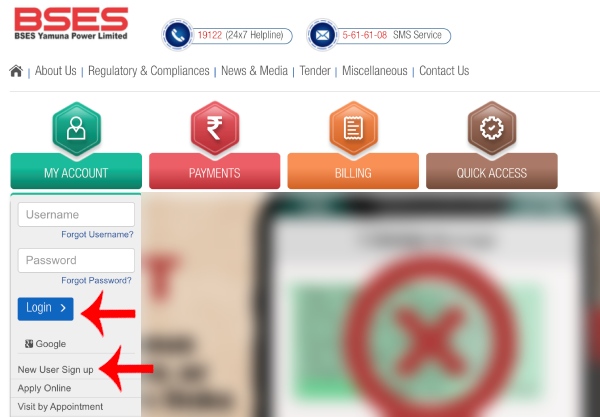
Step 3: Now click on the ‘My Account’ option.

Step 4: Here you will have to log in to your account. So if you already have an account then just enter your username and password and just click on the ‘Login’ button.
But on the other hand, if you are a new user then you will have to click on the ‘New user Sign up’ option. Then you will just have to enter your personal details and create a password for your account. Once you successfully create a new account, log in using your credentials.
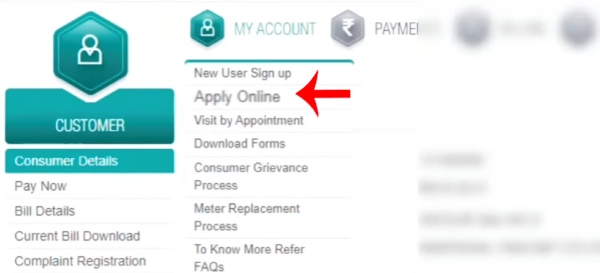
Step 5: Now an interface will be opened. Here you will be able to see your name, CA number, mobile number, address, etc. Here go to the ‘My account’ section and then click on the ‘Apply online’ option present under it.
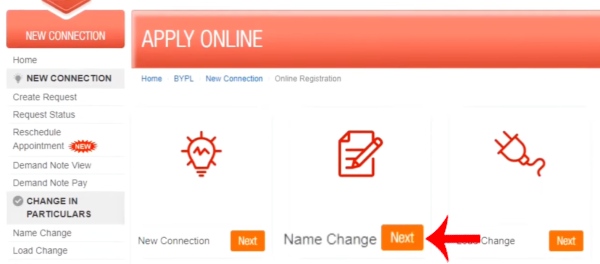
Step 6: Here you will be able to see a lot of options from which you will have to click on the ‘Next’ button present in front of the Change Name option.
Step 7: Now here you will have to enter your ‘CA number’ and then click on the ‘Submit’ button. You will be able to find your CA number on any of your previous electricity bills.
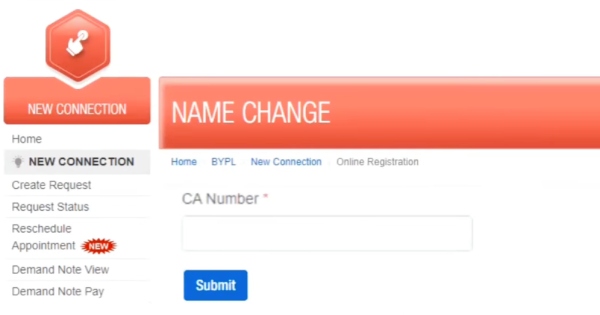
Step 8: Once you click on the submit button an OTP will be sent to your registered mobile number. So just enter the OTP that you have just received and then click on the ‘Submit’ button.
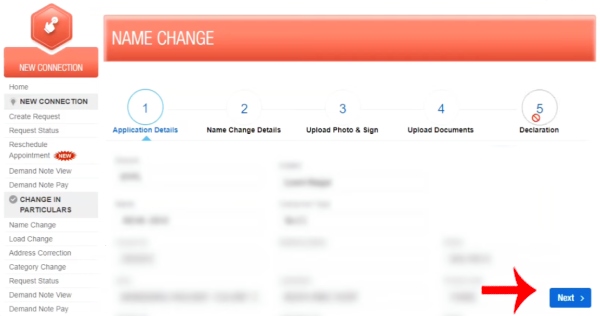
Step 9: Now here you will see five steps. The first step is ‘Application details’ here you do not have to make any changes, click on Next button.
Step 10: Then go to the next step which is ‘Name change details’. Now under the name change details you will have to enter the details of the person you want to add the name to your electricity bill. So enter the first name, middle name, last name, father’s name or husband’s name, email ID, mobile number, and landline no (if any).
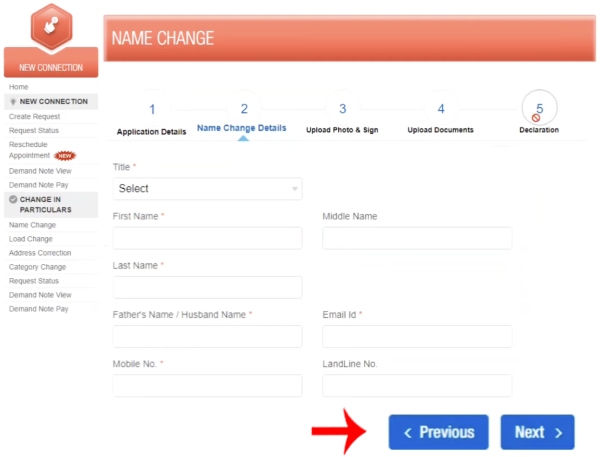
Then you will have to select the reason why you are changing the name on your electricity bill. You will have to choose between the three available options which are purchase of property, legal heir, and change in tenancy, so select your reason accordingly.
Then select your gender, enter the WhatsApp number and your date of birth. Once you have filled all the details correctly just click on the ‘Next’ button.
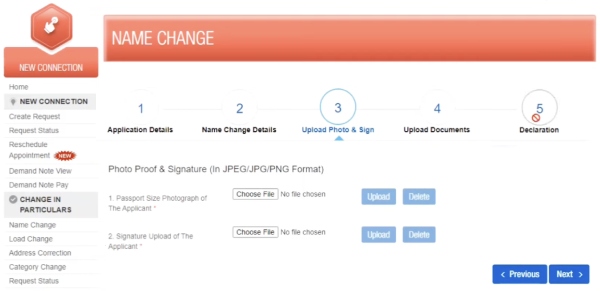
Step 11: In this step, you will have to upload a passport-size photo and signature in jpg, jpeg, or png format. Once you have uploaded both then click on the ‘Next’ button. (Make sure that the format of your photo is correct. Do not upload it in a pdf format)
Step 12: Now you will have to upload any one document. So you can upload any one from an Aadhar card, driver’s license, voter’s ID, PAN Card, passport, photo identity card issued by any government agency, and ration card with a photo. So upload anyone according to your choice and convenience.
Now scroll down a bit and then under ownership proof, you will have to upload any one document. Firstly select the ‘Applicant is an individual’ option. Then you can upload any one of the available options which are a subdivision agreement, possession letter or allotment letter, valid lease agreement, rent receipt not earlier than three months, mutation certificate, etc.
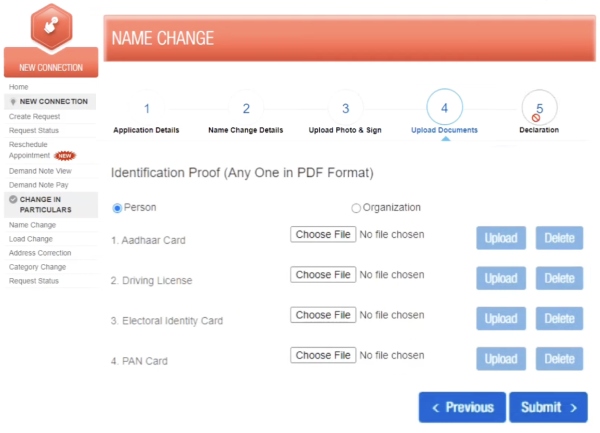
(Check all the options given there and then upload any one according to your choice and convenience. Make sure that this document is in a pdf format. Also, remember that this copy that you upload should be self-attested) Now just click on the ‘Next’ button.
Step 13: Now in this step, the self-declaration form will be opened. Here make sure to check all the details. Then just click on the check box, accept the terms and conditions, and then click on the ‘Submit’ button.
Step 14: Once you click on the ‘Submit’ button the acknowledgment letter for name change will get opened. Also, your SON number which is the ‘Service order number’ will get generated. You have to click on the ‘Print’ option and save this acknowledgment letter in a pdf format.
And voila! You have successfully completed the process for a name change on your electricity bill. You must be wondering how long will it take to change the name on your electricity bill?
So once you have submitted the request to change the name, according to your request the changed name will be given on the electricity bill of the third month. So it takes three months to get the newly changed name on your electricity bill.
We have now successfully covered the entire process to change your name on the electricity bill for Delhi. The process is exactly the same for both BSES Rajdhani Power Ltd and BSES Yamuna Power Ltd as they both fall under BSES. Just take extra care of the format in which you have to upload the documents. Make sure that you do not skip any step in order to avoid any mistakes. We hope that you found this article helpful and if you did do not forget to share this article with your friends and family so that even they can benefit from it.
